


How to Unblur an Image | Hermagic
Knowing how to unblur an image can give life to shots that didn’t quite capture the clarity you wanted. Whether you’re working with a professional shot tainted by unintentional movement blur or a cherished memory that’s a little out of focus, there are a number of strategies and resources available to help reestablish sharpness. From specialised software and AI-powered solutions to straightforward online tools, the method on how to unblur an image can range from clear adjustments to complicated algorithmic corrections. In this blog, we’ll look at various ways to improve picture clarity, helping you turn your blurry photographs into sharp, detailed shots that capture the moment.
Understanding Image Blur: how to unblur an image
Prior to exploring strategies on how to unblur an image, it is essential to comprehend the typical reasons for blurred pictures.
- Motion Blur: This happens when a subject or camera moves while being exposed.
- Outside of concentrate blur is the result of the camera’s inability to concentrate on the subject precisely.
- Lens blur is the result of flaws or restrictions in the lens of the camera.
- Software Compression: Loss of detail due to image compression, especially in digital formats.
Basic Methods to Improve Image Clarity: How to Unblur an Image
-
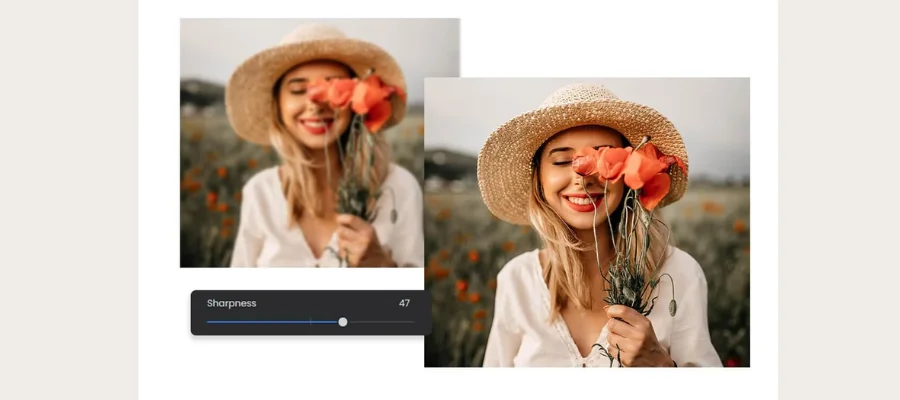
Adjusting Sharpness and Contrast
Utilising picture editing computer programs such as Adobe Photoshop, one of the easiest ways to improve picture clarity is to make adjustments to the contrast and sharpness.
- Boost Sharpness: Alter the sharpness settings to upgrade overall clarity and highlight better details.
- Adjust Contrast: Raise the contrast levels in the picture to sharpen the edges and upgrade the visibility of the surfaces and tones.
-
Cropping and Resizsing
- Focus on Key Areas: Sometimes, cropping out unnecessary parts of the image can reduce apparent blur in critical areas, making the main subject more prominent.
- Resize Carefully: Enlarging a small image can amplify blur, so resize cautiously using interpolation methods that preserve detail.
-
Using Adobe Photoshop Tools
- Smart Sharpen Tool: With this tool, you can precisely manage sharpness by sharpening certain portions of the image without creating noise.
- The High Pass Channel is a tool utilised to enhance picture highlights by drawing attention to edges and textures, resulting in a sharper and more defined picture.
- High Pass Filter: Particular sharpening preserves the normal appearance of the picture by focusing on certain areas and overlooking others.
- Noise reduction: Typically especially helpful in low-light or high-ISO photos as it reduces digital noise, which can cause the picture to seem blurry.
-
Plugins and Filters
- Plugins from Topaz Labs: Programs such as Topaz Sharpen AI use artificial intelligence to assess and improve image sharpness in an intelligent manner, yielding amazing outcomes.
- DxO’s Nik Collection: Plugins like Sharpener Pro, which uses complex algorithms designed for professional use to improve image sharpness and clarity, are available.
-
Adobe Photoshop Express
A condensed online version of Adobe Photoshop Express is available for fast edits and alterations while on the go.
- Online-Based Tool: Adobe Photoshop Express is instantly accessible through your online browser and provides basic capabilities for modifying clarity, contrast, and sharpness.
- Convenience: Excellent for making rapid improvements and changes without requiring complicated program installations.
- Portability: It can be accessed from any internet-connected device, which makes it ideal for remote workers and tourists.
Tips for Better Image Quality: How to Unblur an Image
To minimise image blur in future captures, consider implementing these practical tips.
- Stabilise Your Camera: To lessen motion blur during shooting caused by camera wobble, use a tripod or steady your hands.
- Manual Focus: To guarantee sharpness on the primary subject, manually focus your camera whenever it is feasible.
- Optimise Lighting: Good lighting can greatly reduce blur from camera motions or settings, improving the overall quality of the image.
Today, where visual content is essential for documentation, communication, and preserving personal memories, knowing how to unblur an image is a useful ability. By restoring clarity to blurry images, significant moments that could have been lost due to poor camera performance or difficult shooting circumstances can be preserved. This ability can be crucial for experts in disciplines like journalism, forensics, or photography to retrieve important information from less-than-ideal photos.
Furthermore, as social media and other online platforms still place a high value on visually appealing content, learning how to sharpen and enhance photos can greatly boost your online presence. The methods for de-blurring photos provide a strategy to make the most of each image, guaranteeing that no crucial visual information is lost due to blur, whether you’re conserving family portraits, enhancing marketing collateral, or evaluating visual data.
How to Unblur an Image using Adobe Photoshop
- Launch Your Picture: Start by opening the fuzzy image you wish to improve in Adobe Photoshop. Go to “File” > “Open” and choose your computer’s picture file.
- Make a copy of the Background Layer: Duplicate the background layer to keep the original safe. Right-click it in the Layers panel and choose “Duplicate Layer.”
- Apply the Sharpen Smart Filter. Select “Filter” > “Sharpen” > “Smart Sharpen…” To sharpen without adding noise, move the Amount and Radius sliders in the Smart Sharpen dialog box. To apply, click “OK”.
- Apply High Pass Filter for Extra Sharpness: Right-click and choose “Duplicate Layer” once more to create a duplicate of the layer that has been sharpened. Proceed to “Filter” > “Other” > “High Pass.” After highlighting the edges with the Radius adjustment, switch the duplicate layer’s blend mode to “Overlay” or “Soft Light” for finer details.
- Fine-Tune with Adjustments: To further improve contrast, and brightness, or minimize noise, make adjustments to the image’s levels, and curves, or apply additional filters from the “Filter” menu.
- Save Your Enhanced Image: Select “File” > “Save As…” to save your enhanced image if you’re happy with the changes. To save the final version of your unblurred image, select the format and save the location on your computer.
Conclusion
Gaining proficiency with Adobe Photoshop’s unblurring feature opens up a world of possibilities for improving visual content. Know how to unblur an image with the help of strong features like High Pass and Smart Sharpen, Adobe users may turn grainy photographs into crisp, high-definition pictures fit for a professional’s use. With the help of these approaches, photographers, designers, and hobbyists can enhance their creative creations with accuracy and grace in addition to restoring clarity and detail. Whether enhancing images for personal use or creating professional graphics, Adobe Photoshop is still a vital tool for producing amazing effects and making sure every detail is seen clearly and impactfully.
To know more about how to unblur an image, visit Hermagic.
FAQs